
Introduction
Memcached is a high-performance memory object caching system that boosts backend database speed. It works by storing frequently or recently requested data directly in memory, which significantly reduces the number of direct requests your application makes to the database.
You will need Memcached when your application frequently queries the same data from a slow or expensive backend database (like during high traffic).
It's essential when you want to reduce database load, decrease response latency, and improve application scalability by quickly serving that data from memory instead. Specifically, use it for caching session data, frequently accessed database query results, or API responses.
Prerequisites
To follow this tutorial, you will need:
Ubuntu 22.04, 20.04, 18.04 or older server with a sudo non-root user.
What You'll Learn
This guide will show you how to:
- Install and configure a Memcached server.
- Verify and test a Memcached server.
To install Memcached from the official Ubuntu repositories, you must first update the local package index using the apt command.
Install the memcached package and the libmemcached-tools which provides command-line utilities for interacting with Memcached.
#or
sudo systemctl start memcached
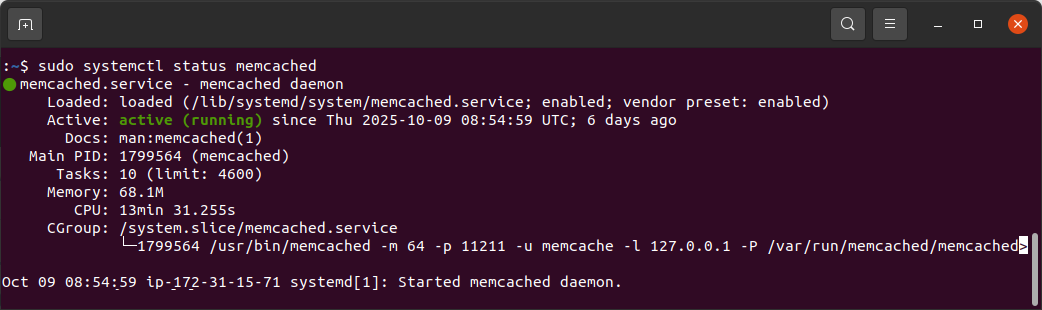
To confirm that the Memcached service is running and ready for use (or to check why it failed), we can use these commands. If it's stopped, run the following systemctl start command to start it.
After running the status command, we can see a full status report on Memcached service: current status (Active), PID of the service, used memory, security group, user port number, running time and date.
Usage
After installation, Memcached is typically available and listening for connections on the default TCP and UDP port 11211.
localhost:11211
127.0.0.1:11211
Summary
This article taught us how to install, configure, and secure the Memcached memory object caching system on an Ubuntu server